
WordPress is a content management system as well as a website builder. This means you don’t have to build every page using the WordPress interface, even if your site is hosted on a premium WordPress theme. It’s completely OK to create a custom HTML page or take WordPress landing page templates from an earlier website and then import them into WordPress. Importing HTML files and pages can save you time while setting up your website or adding new, personalized content if you’re establishing or growing a WordPress website.
Upload an HTML File to WordPress
1. Go to your Admin Dashboard and log in.
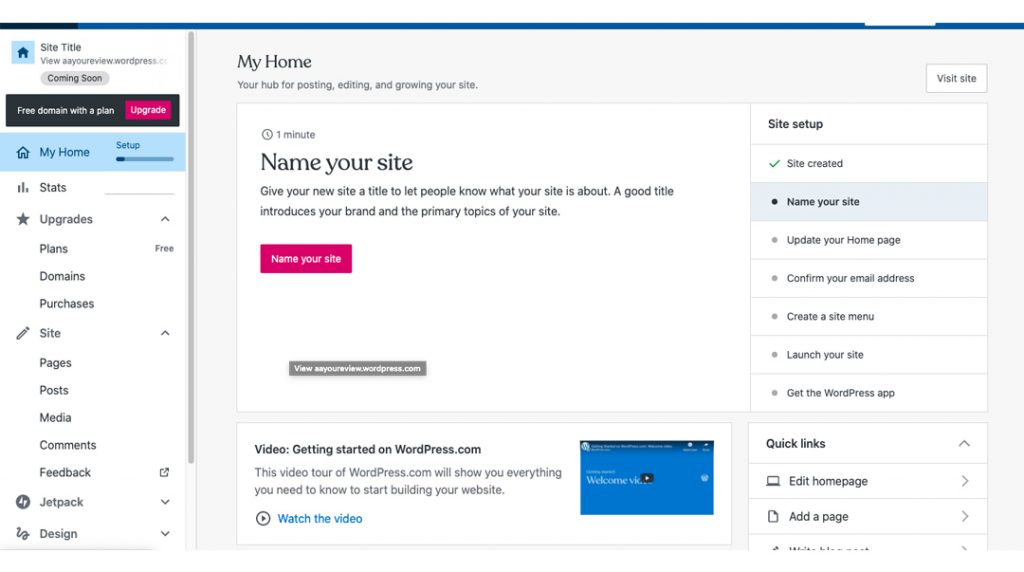
To easily add HTML files to your website, use the WordPress Visual Editor. Go to your admin dashboard first to get to the Visual Editor.
2. In the left sidebar, select ‘Posts’
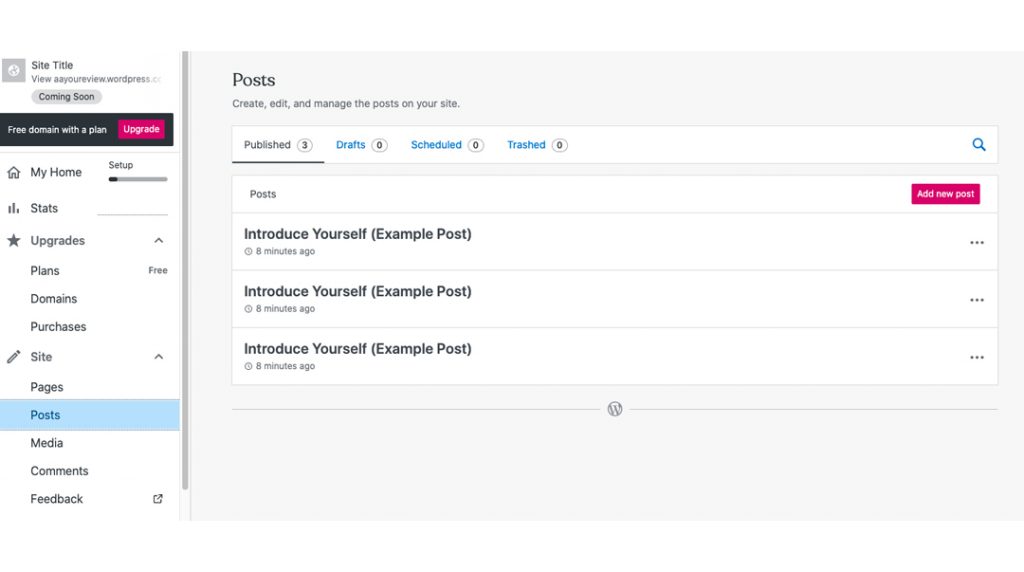
After that, have a peek at the left-hand sidebar. A “site” option should be available. Select “Posts” from the submenu after clicking it. This should bring up a new screen on the right side of the screen.
3. Create a New Post or Edit an Existing One
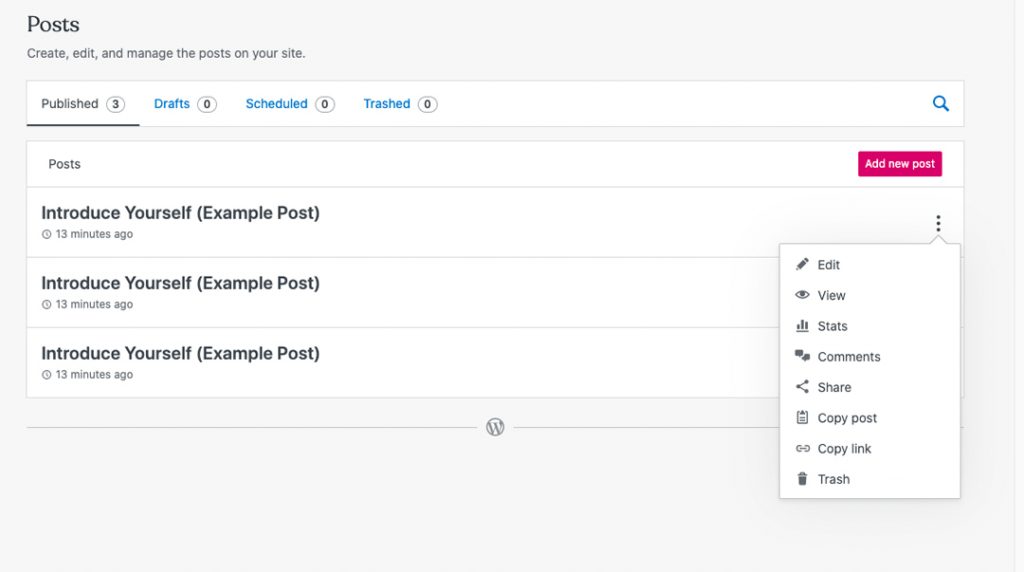
You should now be able to choose between editing an existing post and creating a new one. Simply select the “Add a new post” option in red to create a new post. To edit an existing post, pick “edit” from the dropdown menu by clicking the three vertical dots next to the post label. The Visual Editor will launch automatically after you select where your file will be uploaded.
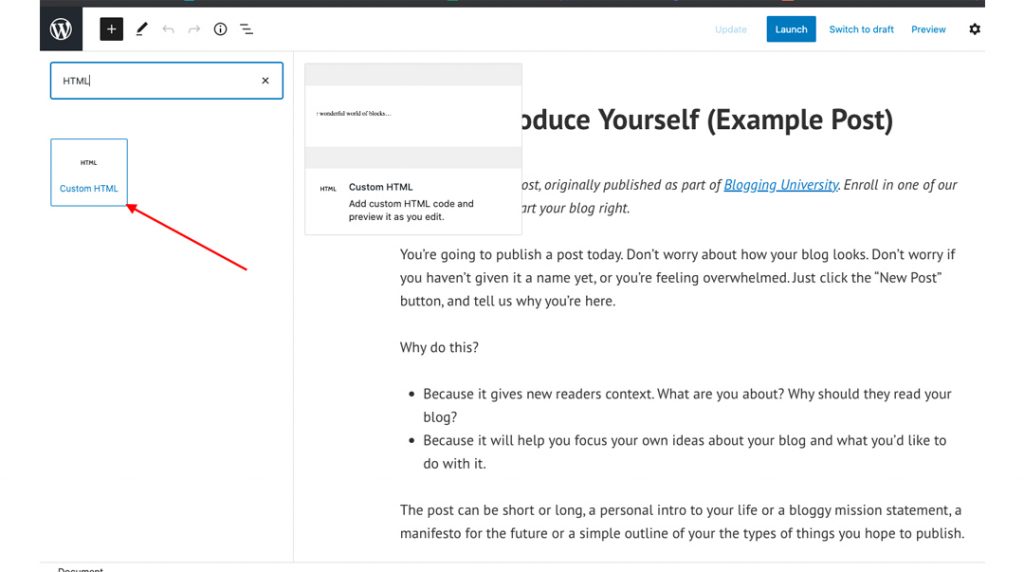
4. Select ‘Add Block’ from the drop-down menu

When you’re in the Visual Editor, go to the top left and select “add block.” A dropdown menu will appear on the left side of the screen. You can consider a WordPress landing page template.
5. A ‘File’ block should be included
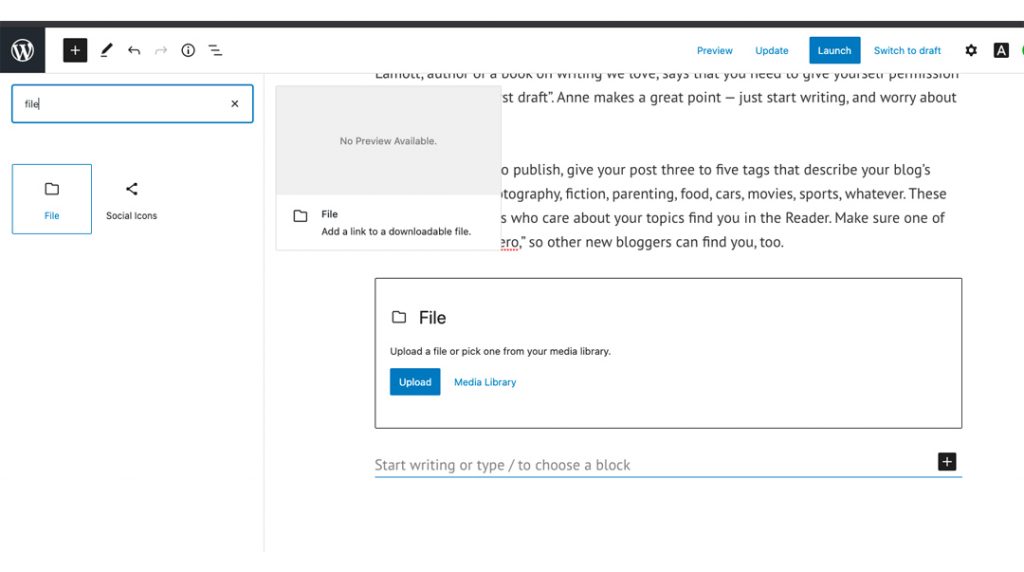
Search for the term “File” in the search field at the top of the lefthand menu. Then, to upload a new file, click on it. You can also look for “HTML” in the search box. You can use this block to input HTML, but you’ll have to manually copy and paste it into a code block. This works if you’re posting little snippets of code, but for larger uploads, the media option is more efficient.
6. Select an HTML file
Select “upload” from the drop-down menu in the module that opens. Then select the HTML file you want to include in the post. Once you’ve chosen your file, it should be added to your post instantly. You can also save the file to your computer’s media folder. You’ll be able to reuse the HTML file in other blog articles as a result of this.
For more information on how to manage WordPress websites, visit JThemes Studio. It’s time to modernize your website with Jthemes, premium WordPress theme HTML5, CSS3 Templates, which will help you convert more visitors into paying customers.